As part of our effort to protect users from getting into phishing traps set by hackers, we will be posting instructions on how to protect yourself from phishing attacks by verifying site authenticity.
In this post we will provide instructions on how to check website SSL certificate in Internet Explorer 10 running on Windows 10. To use this guide make sure that you’re running native version of Internet Explorer 10 on Windows 10. Microsoft Edge version of Microsoft Internet Explorer doesn’t allow user to view certificate details.
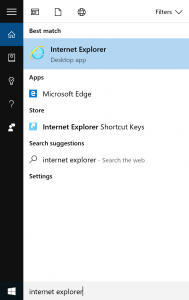
- Launch native Internet Explorer for Windows 10. In order to launch native Internet Explorer on Windows 10, you need to type “internet explorer” in Windows search bar. You should see “Internet Explorer” item appear in a list above. Click on it.
- Enter website address into browser address bar.

- Find a lock icon on the right side of the Internet Explorer taskbar. If you don’t see lock icon, it means that website is not using SSL encryption and it is not safe to use it for anything other than reading content from it.
- Click on lock icon. You will see a popup window with basic certificate information.
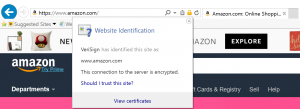
- To get detailed information about the certificate click on “View certificates” link at the bottom of this popup window
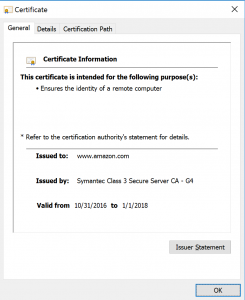
- Window with certificate details for the website will open
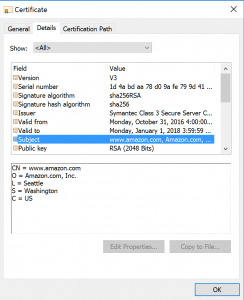
- Click on “Details” tab in order to view all factual details about the website certificate. Look for the “Subject” field to see details about the company which received SSL certificate and verify that the name of the company is correct. Also check the “Issuer” field. Typically it will be Verisign, Symantec, GeoTrust, Comodo or Thawte
If the website is not SSL encrypted (you cannot see its SSL certificate) or some information in SSL certificate doesn’t seem right, avoid using this website until you can verify its identity. Also make sure that website name was spelled correctly.